What are products?
Products are the things you wish to sell on your webshop. There is no limit to the amount of products you have in your webshop. Products can be arranged using product categories. Product categories determine how the products are shown on your webshop.
When you create a product you can choose to publish it right away or choose to do it later. You can publish or publish a product anytime you want.
The product info page gives you information about the price, number in stock and a sales history.
Adding a product description not only helps your customers choose the right product but it also adds SEO value.
It’s important to create all your products, in that way your customers can see them on your live webshop.
If you need help creating a product follow the steps below.
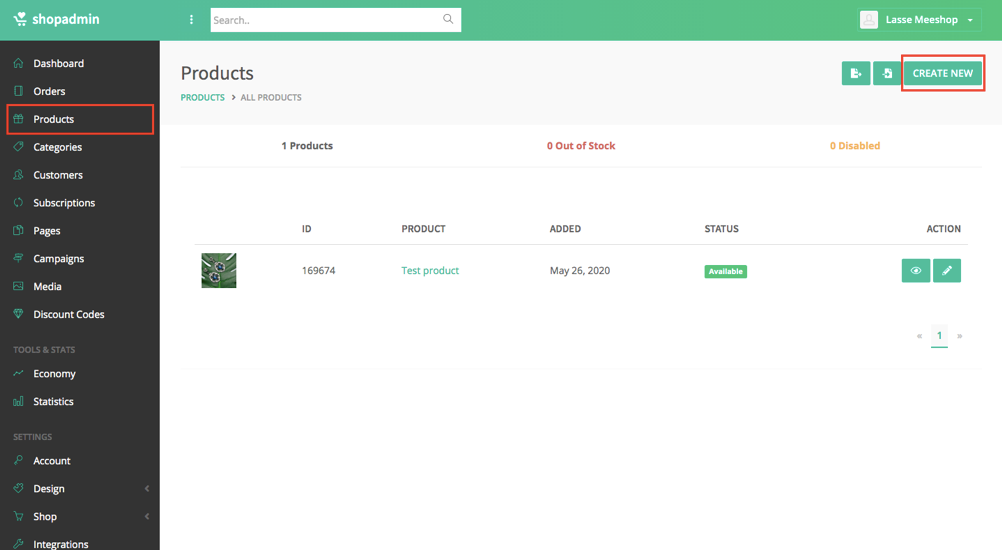
Overview of your product page.
In the overview section, you will find a number of different informations.
Firstly you will see the quantity of products in your webshop. You can see how many of your products are out of stock and how many of them are unpublished (meaning they are only visible in your backend and not yet visible on your webshop).
Secondly, you will see the product-ID, the product name, what date the product was added and the current status (available/not available).
Lastly, you have the opportunity to either view, edit or create a product.
The overview-page looks like this:
How to edit an existing product?
Click on the edit button (the pencil), this will take you to the product editing page. From here you are able to edit or add any information you want.
How to add a new product?
To create a new product click on the ‘Create New’-button in the top right corner of the product overview, now you will enter a page called "Add product".
From here, you can add the following things: Product info, Stock management, Images, Categories, Fields, Grouping, Variant, Tags, Discount and Metadata.
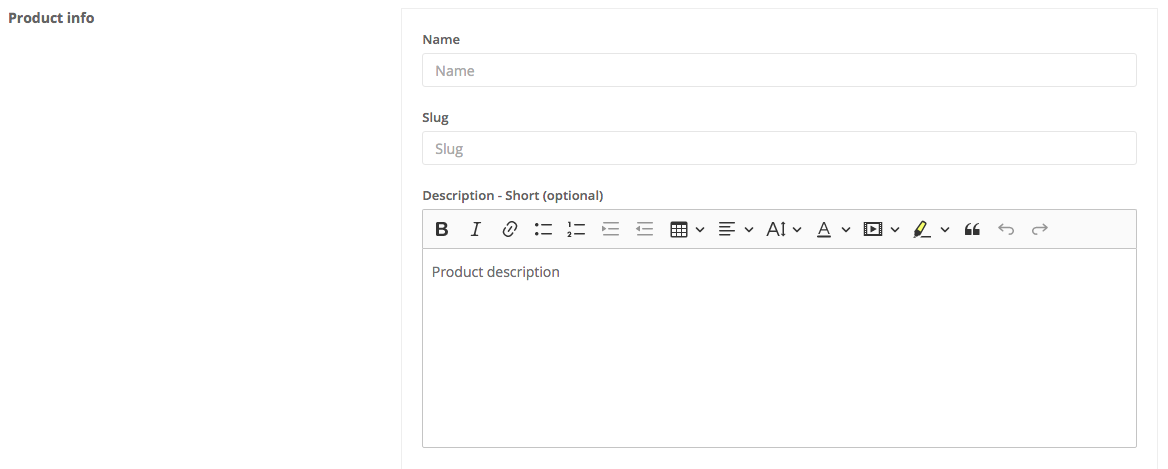
Product info
Not optional. Start by adding a name for your product.
The slug is the text shown in your URL. It will be created automatically when you add your product name. The slug will look very similar to the name of your product. It’s important, if you have two similar products, that the slugs are different from each other. You can’t have two products with the same slug. The slug is the product's identification therefore every product needs its own unique slug. If you have two identical products (e.g. add 1, 2, 3 after the slug).
(Slugs are only allowed to have lower case letters from a-z and spaces between words have to be substituted for dashes.) You can change the slug manually, if you want to.
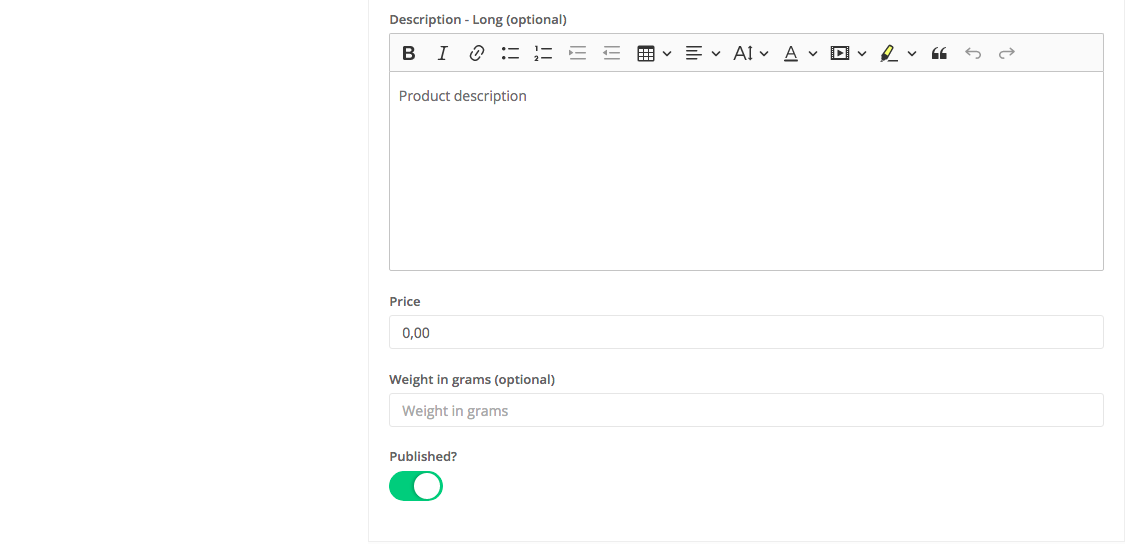
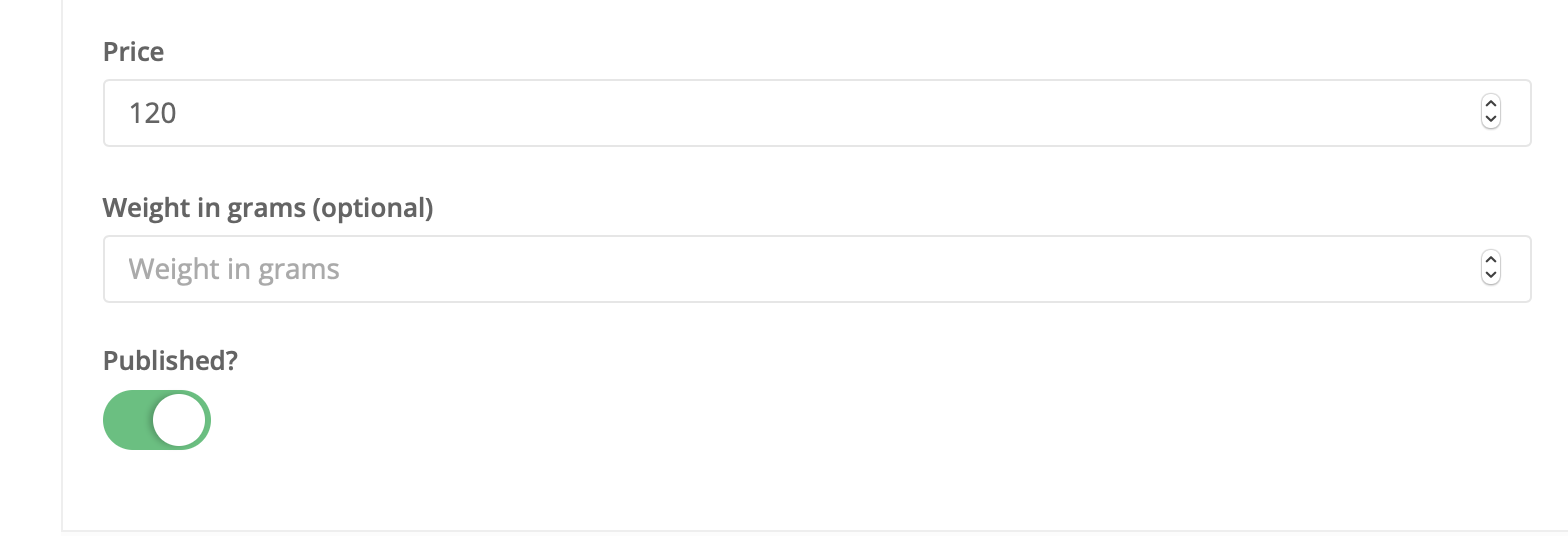
Now you have the possibility to write a short or/and long product description. The short description will be shown next to the main image just under the price. The long description will be shown below the picture. Add a price. Add a weight (if needed).
As a default your product will be published when you press the save button at the bottom of the page. If you don't wish your product to be visible in your webshop, you need to click ‘Published?’ to turn it off (turns red). Now you can leave your product be for further editing. The product will then appear in your backend for future use but will not show on your webshop yet. A published product also can still be edited.
Stock management
Not optional.
Stock management helps you keep track of your inventory. It will also show your customers when the stock number is below 10.
With stock management, you have two options:
You can either set it to automatic or manual (right button).
The automatic setting is the default. All you have to do is enter the amount of products you currently have in stock, and everytime you make a sale, the number will automatically decrease equal to the amount sold.
If you wish to set the stock manually, you have to click the automatic button on the left to deactivate the default setting (“enable automatic stock” turns red and “in stock” turns green). After this, you can click the button on the right to choose if the product is in stock or not. With the manual option, you don’t have to enter the number of products in stock. Please note that if the stock number is set from 1-9 the number will show up on the product page as “Only x left!” with the current number. Leave the stock number field empty if you don’t wish to display the before mentioned “Only x left!”.

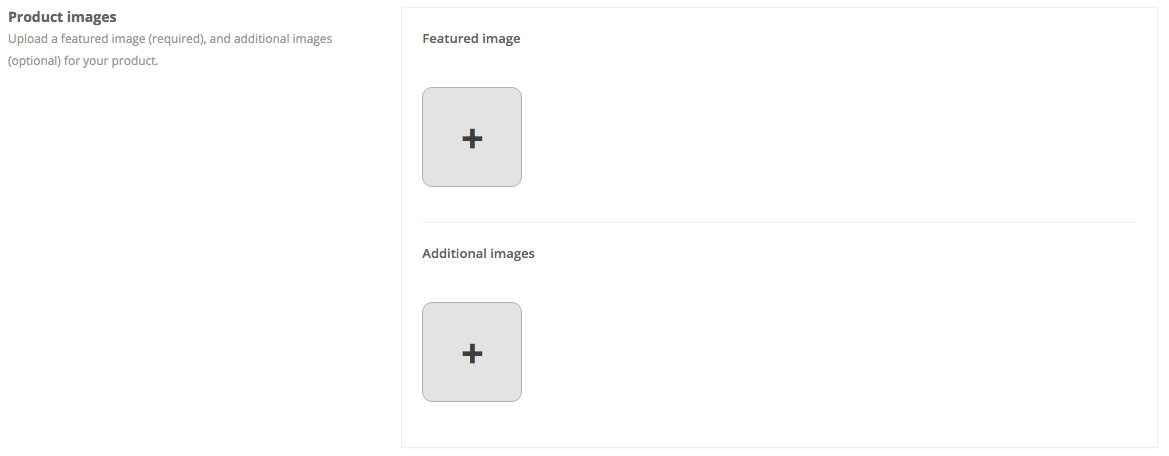
Product images
Not optional.
‘Featured image’ is the primary image shown on the webshop. ‘Additional images’ (optional) are the extra images. Click on the pluses to upload new images. If possible, only use square images, as these look the best. Images will automatically be downscaled or upscaled to 1000x1000 pixel, so try to avoid images with a lower resolution than this, as upscaled pictures can look blurry.
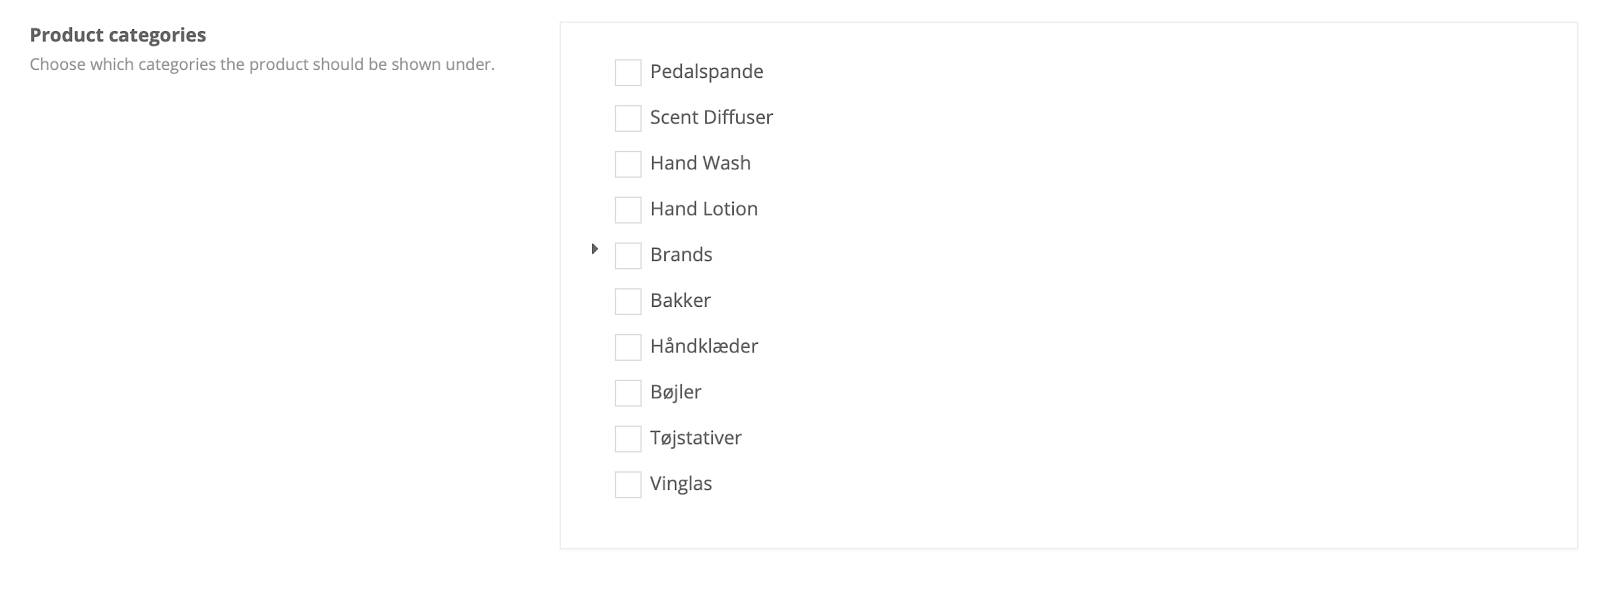
Product categories
Not optional.
Before you can add your product to a category, you first have to create the category or subcategory (follow this link to our category guide). Your category/categories will appear under ‘Product categories’, just select the category you want to add your product to. If the product is part of a subcategory, first select the main category and then the subcategory from the dropdown.
Product fields
Optional.
Product fields are used if you wish to add extra information about your product. Start by giving your field a name (e.g. ‘country of origin’) and then add the value (e.g. ‘Denmark’). Fields will be shown below the product-images under ‘More information’. Product fields are a great way to display technical data about your product.

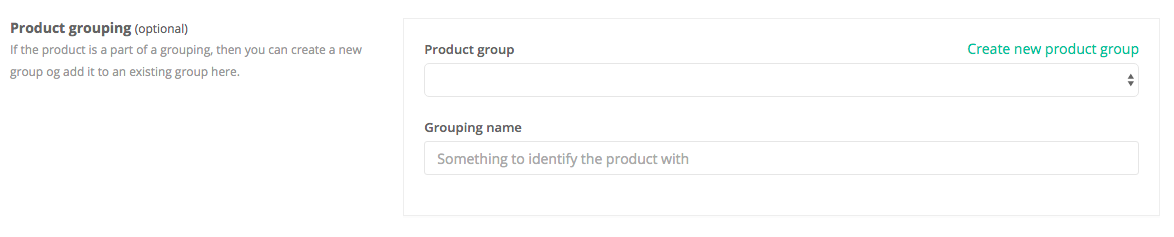
Product grouping
Optional.
Put a number of chosen products ‘together’. When you click on a product and enter the product page, you will see the other products that belong to the product's grouping.
Product variant
Optional.
Product variants allow you to add variants to your products, eg. color, size or something similar. Add the variant under “option” and press enter and then the values (e.g. S/M/L or red/blue/white). To add a value, write the value and click enter (to lock it) between the different values. If you wish to add multiple variants, click “Add variant option” and repeat the process. When you have added the needed variants, click “Generate variants”. This allows you to enter price and stock for each variant of the product.
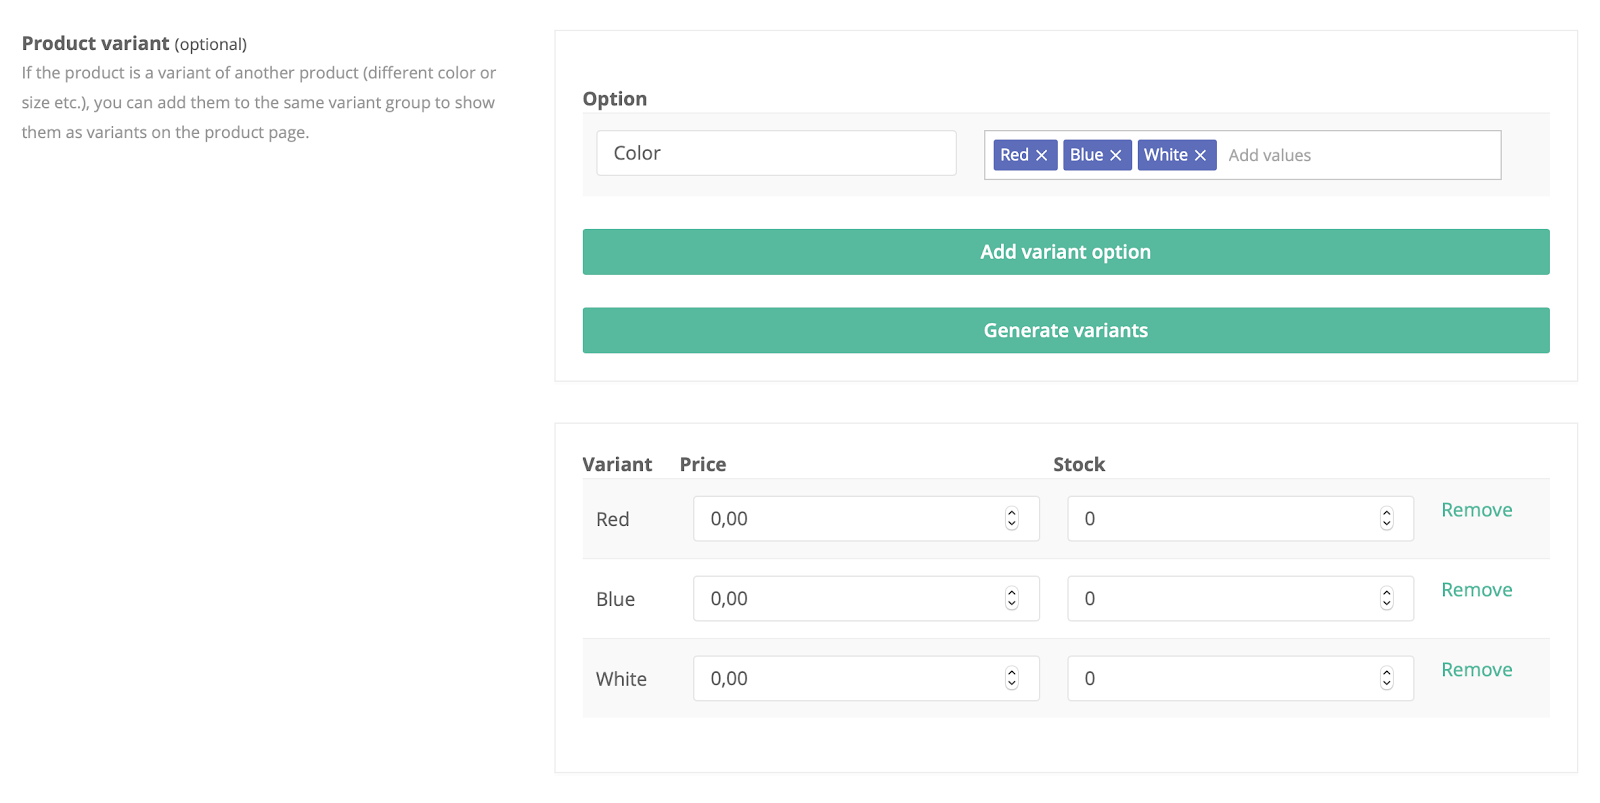
The price you set earlier will be the one showing on the webshop’s product listing page. If you change the prices for each variant, the main price will still be shown on the product listing page, but as you click on different variants on the product page, the specific prices will change accordingly.
If you have chosen automatic stock management for the product, the total stock will be calculated based on the stock for each variant. As long as you have 1 or more products in stock (across all variants), the product will be shown as ‘in stock’ in the product listing page. However, if specific variants are sold out, this will be shown on the product page.
If you have chosen manual stock, the product will be shown as long as there are 1 or more products in stock.
Be aware: For a variant to be shown as out of stock, you manually have to change it.
Product tag
Optional.
Product tags are used for the search option on your webshop. If a customer uses the search function a given product will only show on if the tag matches the search. For example if a customer enters the word “t-shirt” in the search field it will show all products with a matching tag or product name. The product name will automatically be searchable.

Product discount
Optional.
You can either create a discount based on a percentage or on a specific amount of dkk. If you enter the discount in percentage, the discount in dkk will automatically be generated and vice versa. If you wish to limit the discount to a specific period, press ‘Create discount campaign’ and choose date-range and price. This can only be done when you have saved the product and then afterwards edit it.

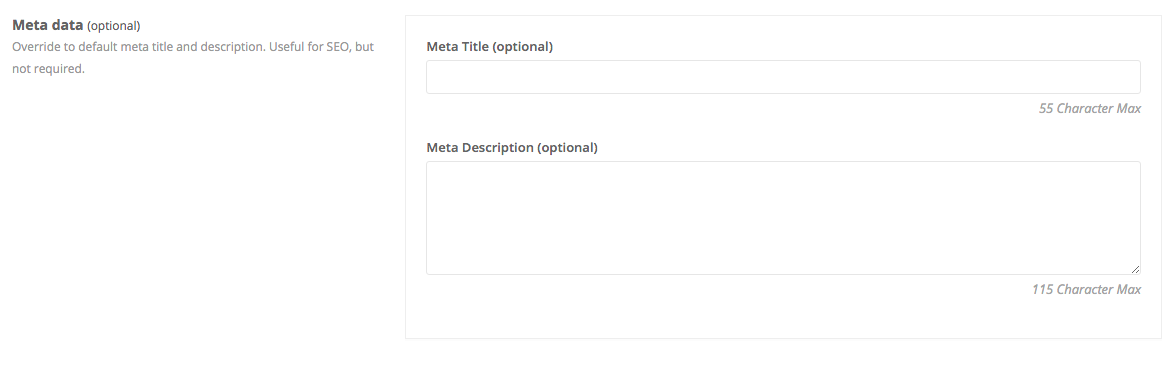
Meta data
Optional.
Meta data is primarily used for SEO (search engine optimization), write specific buzz words or sentences you wish to use so potential customers have an easier time finding your webshop and products via search engines.
Save your product
When you are done filling out all the information, click “save”. This saves the product.

By default the product will also be published when you press save. If you do not wish to publish the product right away you have to click the “published?” button under product info at the top of the page.
You can always edit/update any given product at any given time.
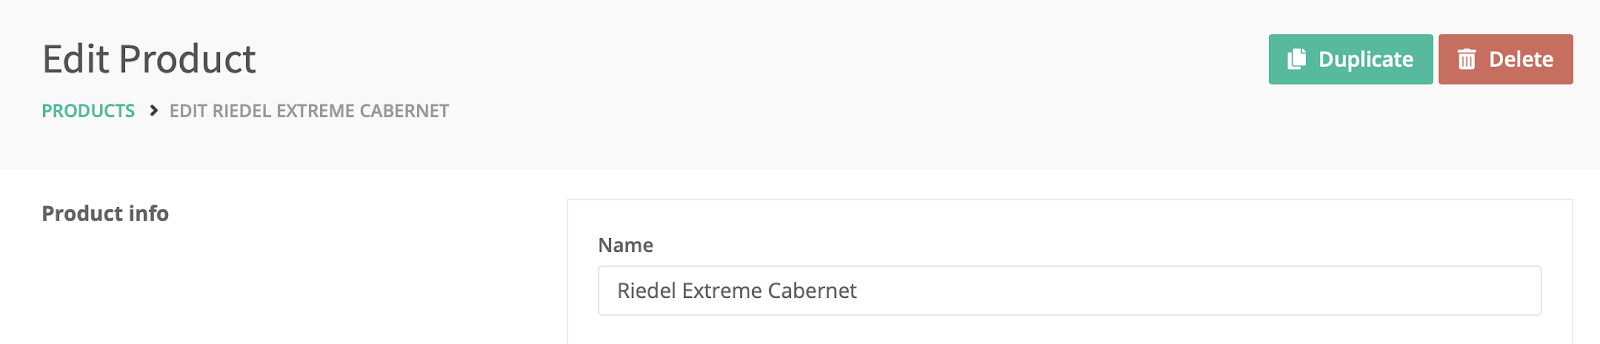
How do I delete a product?
Click on the edit button (pencil) on the product you want to delete.

At the top of the product page “delete”. Your product has now been deleted and will no longer show on your products page or on your webshop. Please note that there is no way to recover the product after it has been deleted.